

AI Integration Quick Reference
AI Integration Quick Reference
React Native UI Kit Sample App
Reference implementation of React Native UI Kit, FCM and Push Notification Setup.
What this guide covers
- CometChat dashboard setup (enable push, add FCM provider) with screenshots.
- Firebase + React Native wiring (credentials, the push package, the Google Services plugin).
- Wiring the package’s notification and call handlers into your app.
- Native Android setup (Gradle, notification icon) — no manifest entries or Kotlin code to write.
- Token registration, notification/call handling, navigation, testing, and troubleshooting.
- App icon badge count using
unreadMessageCountfrom the CometChat push payload.
How FCM + CometChat work together
- FCM’s role: Issues the Android registration token and delivers the push payload to the device.
- CometChat’s role: The FCM provider you add in the CometChat dashboard stores your Firebase service account. When
CometChatPushNotifications.init()runs after login, the package registers the token for the logged-in user, and CometChat sends pushes to FCM on your behalf. - The package’s role: Its own
FirebaseMessagingServicereceives each push and shows the chat notification or the full-screen incoming call. Every CometChat action — registering the token, accepting or rejecting a call — runs in JavaScript through the Chat SDK your app already uses. - Flow: Permission (Android 13+
POST_NOTIFICATIONS) → Firebase returns the FCM token → after login,init()registers it withAppCredentials.fcmProviderId→ CometChat sends to FCM → FCM delivers to the device → the package shows the notification or call → youronNotificationTap,onCallAcceptedandonCallEndedhandlers navigate.
1. Enable push and add providers (CometChat Dashboard)
- Go to Notifications → Settings and enable Push Notifications.
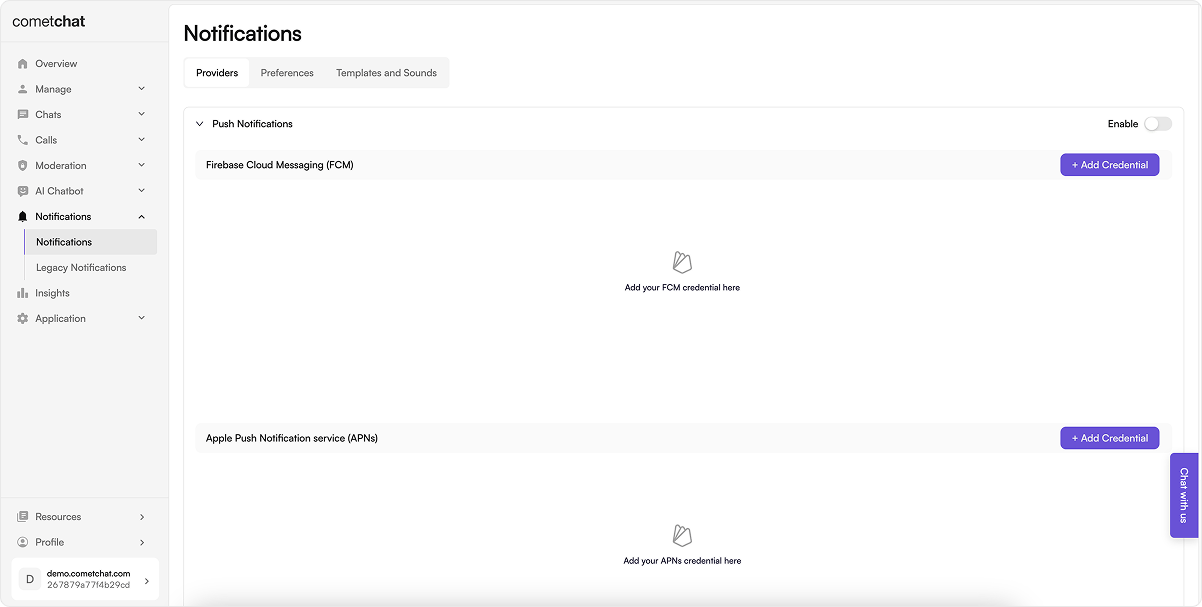
- Click Add Credentials, choose FCM, upload the Firebase service account JSON (Firebase → Project settings → Service accounts → Generate new private key), and copy the Provider ID.
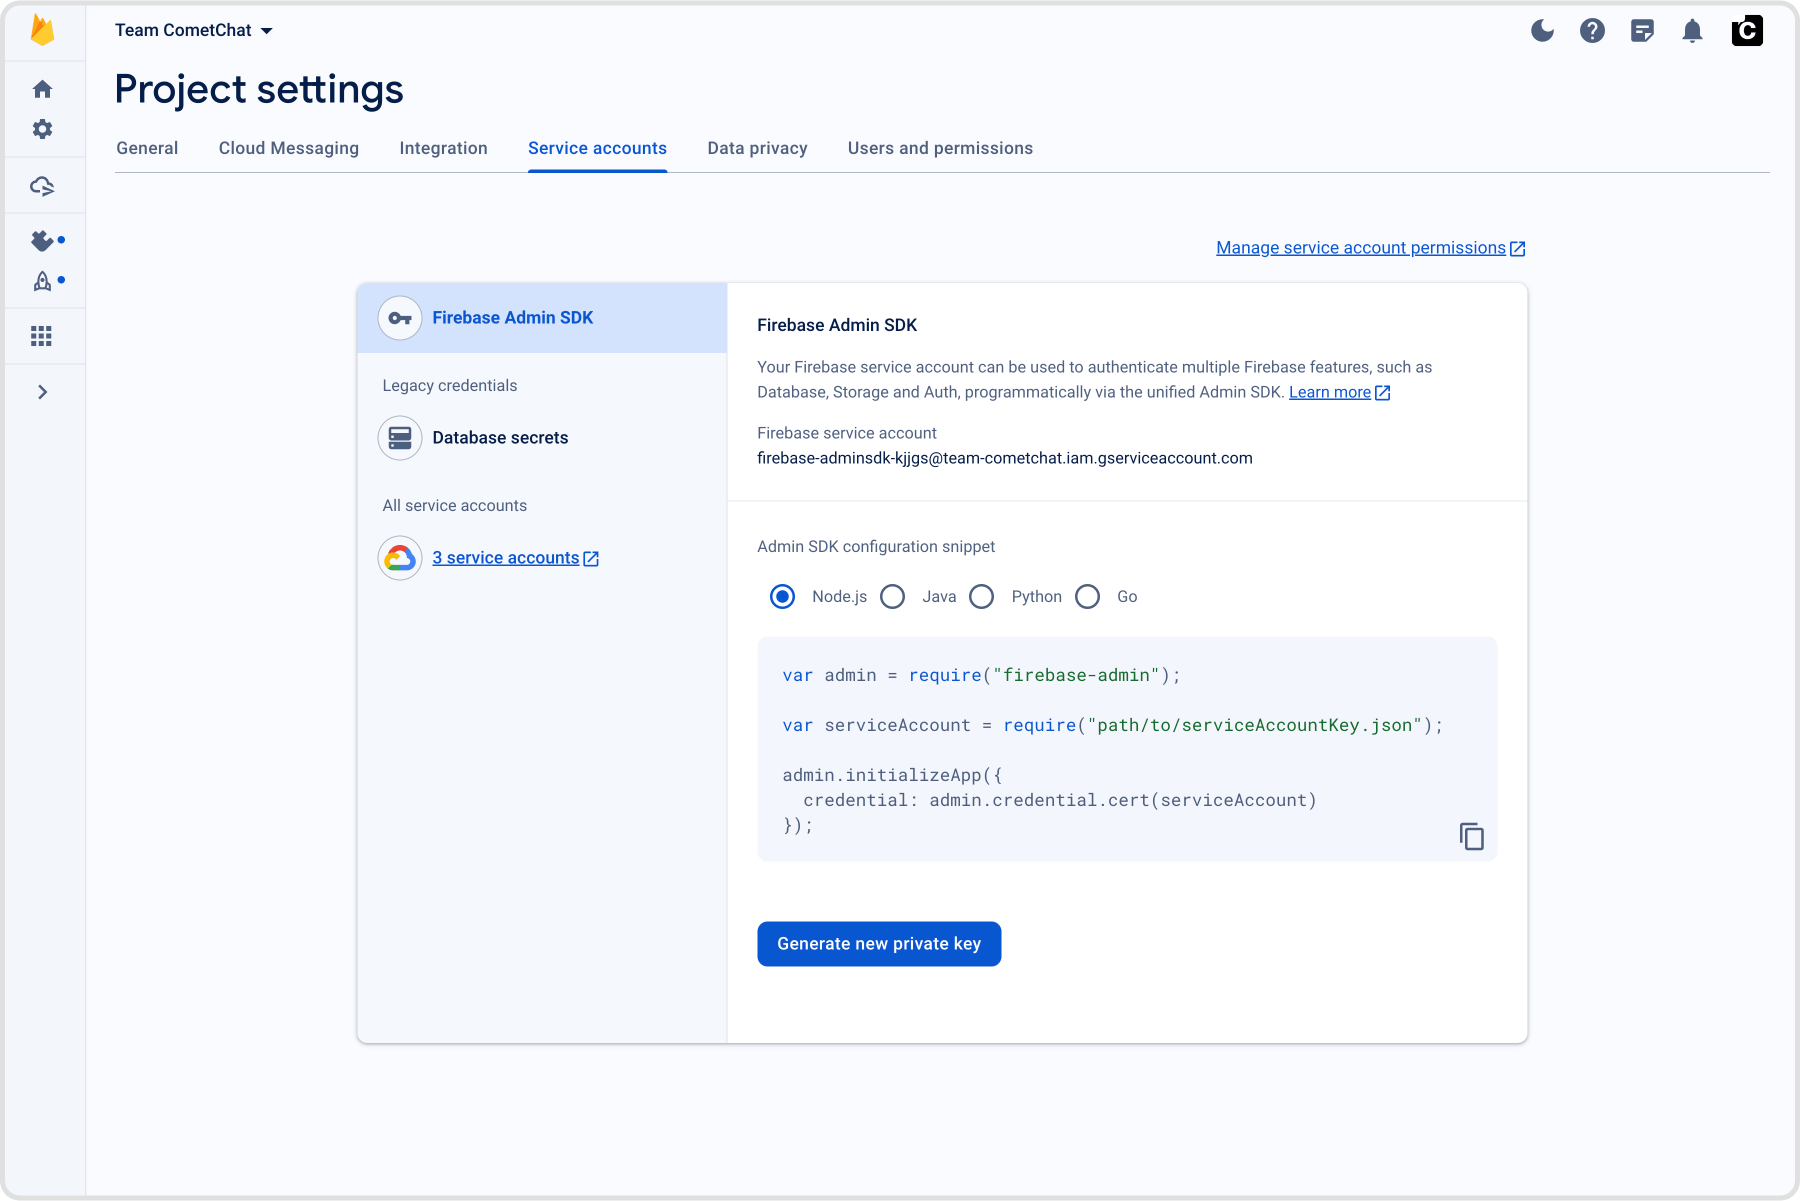
AppCredentials.fcmProviderId.
2. Prepare Firebase and credentials
2.1 Firebase Console
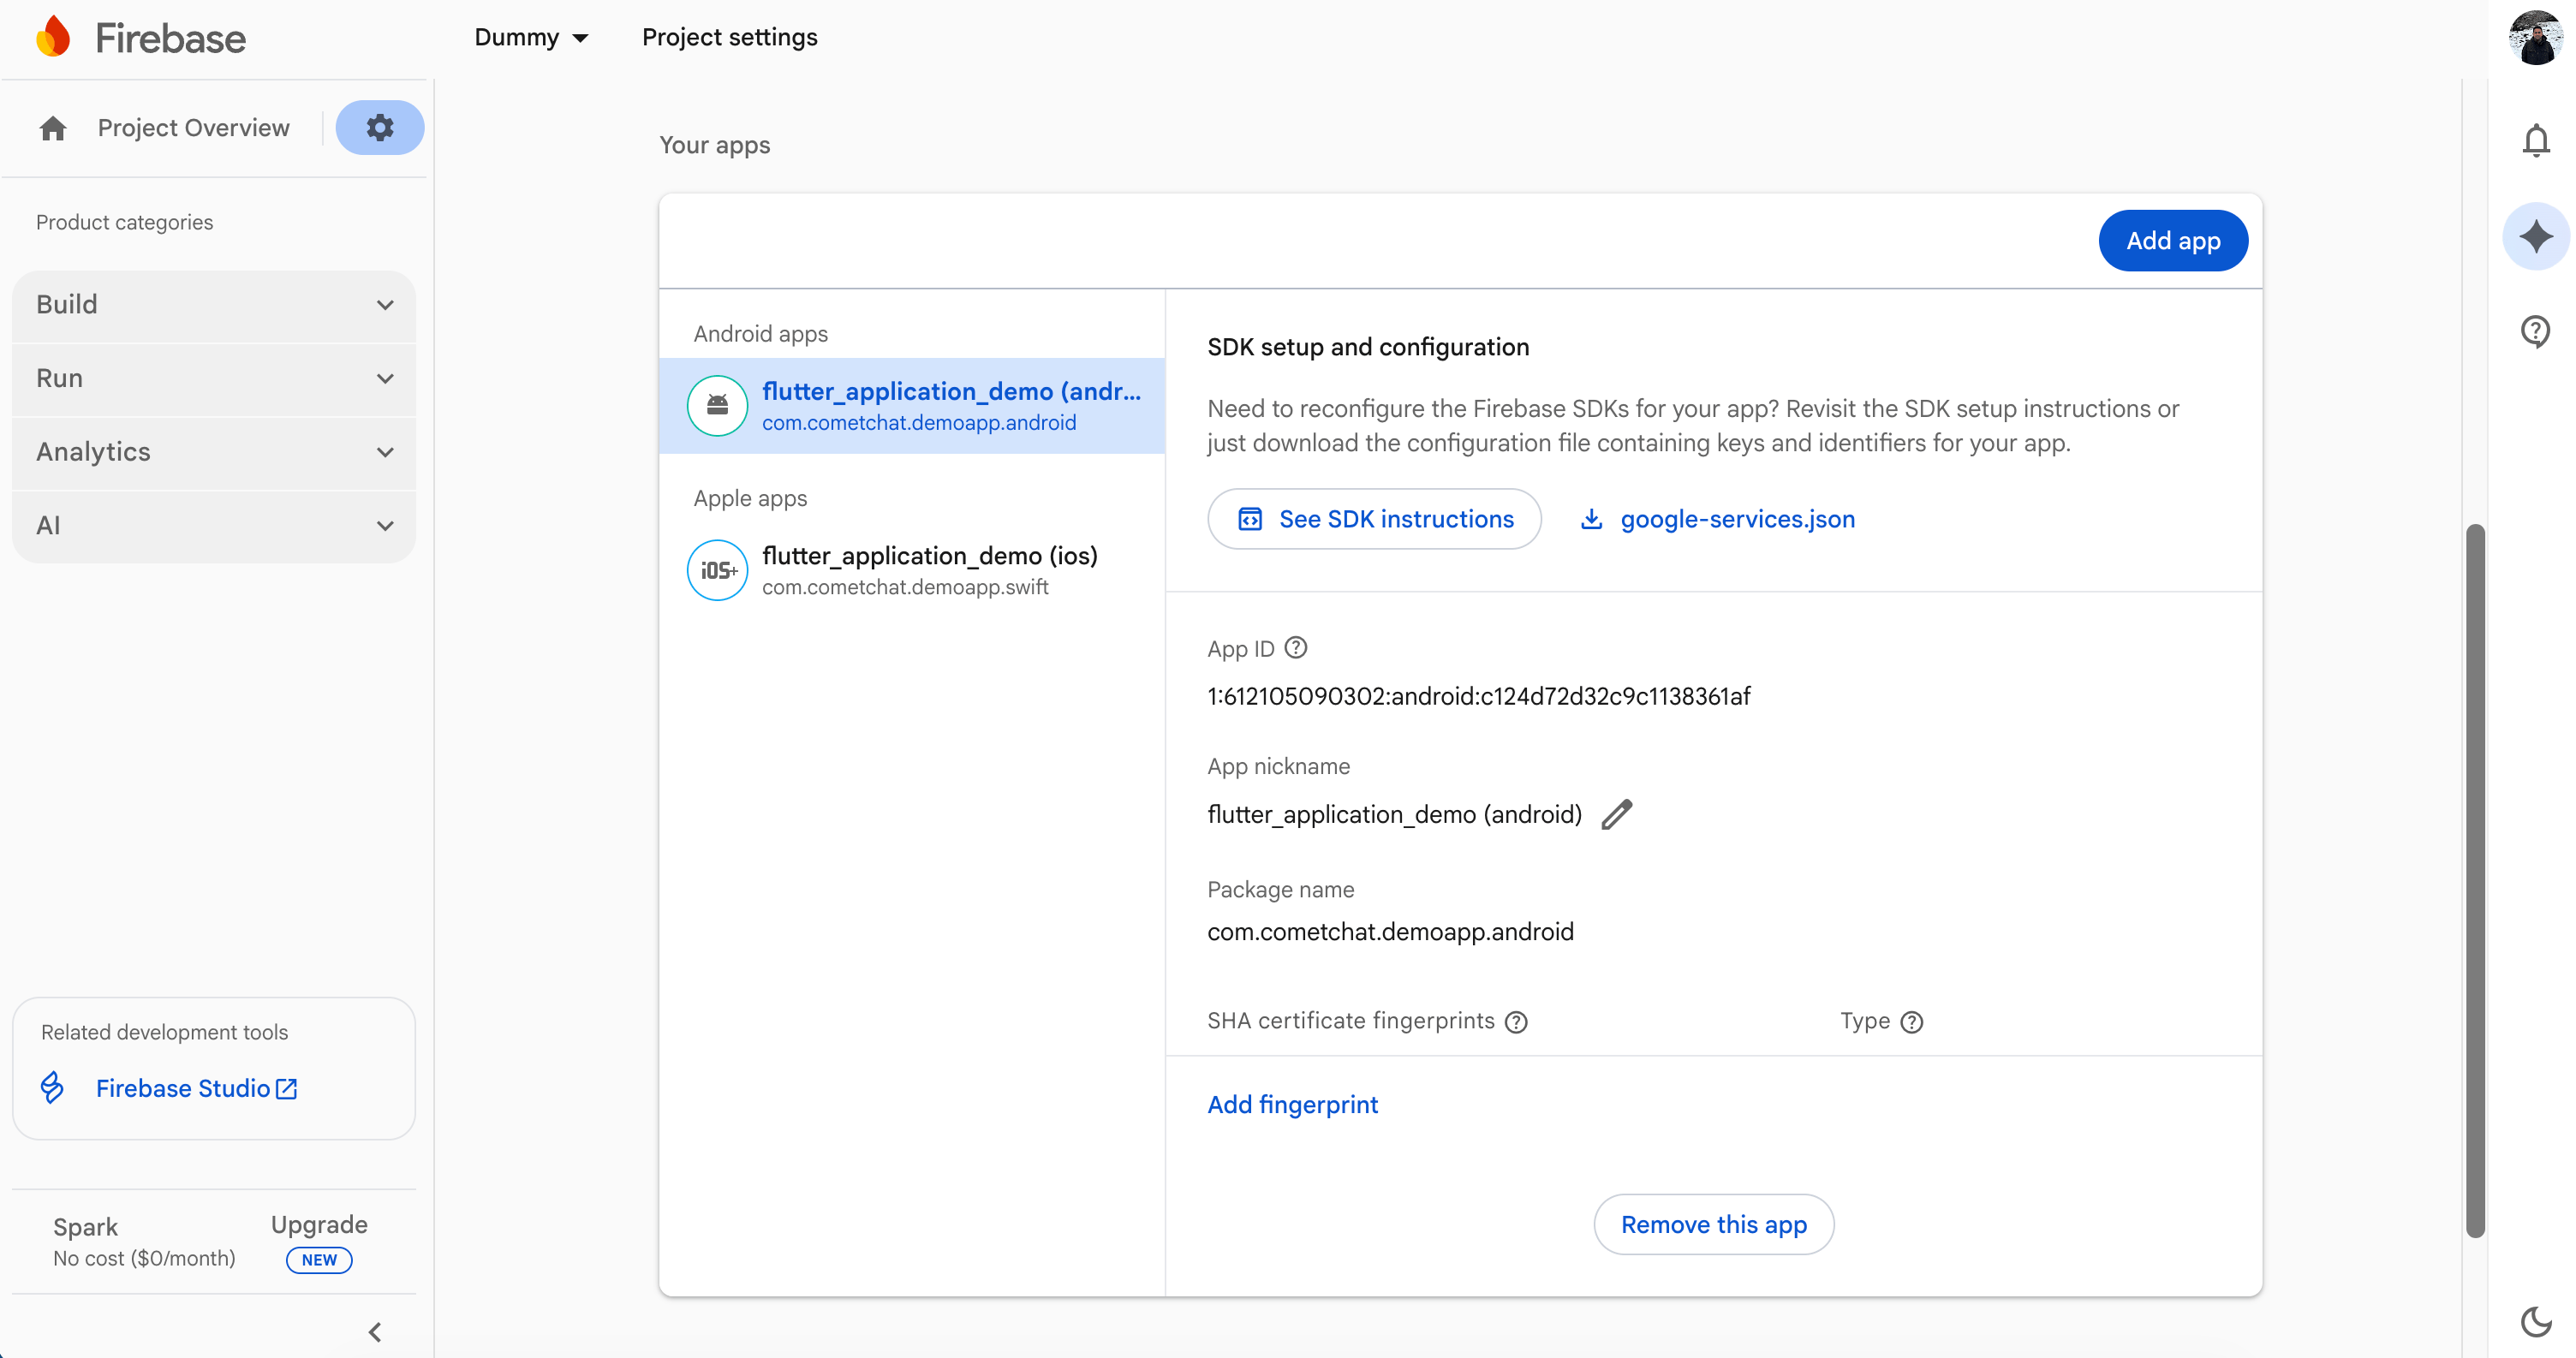
- Register your Android package name (the same as
applicationIdinandroid/app/build.gradle) and downloadgoogle-services.jsonintoandroid/app. - Enable Cloud Messaging.
2.2 Local configuration file
Createsrc/AppCredentials.ts with your app credentials and provider IDs. The same file serves the iOS guide:
src/AppCredentials.ts
3. Bring the push package into React Native
3.1 Install the package
3.2 Wire the entry points
The JavaScript below is the same for Android and iOS — one set of files serves both guides. Lines for one platform do nothing on the other:
registerBackgroundCallTask() and notificationSmallIcon only apply on Android, and waiting for each permission answer before the next request matters only on Android.index.js — register the package’s background task at module scope. It lets a fully killed app reject a call declined from its notification: the package re-initializes the Chat SDK with the settings init() saved, and rejects the call.
index.js
src/navigation/navigationRef.ts — a notification tap or answered call that launched the app arrives before your navigator exists, so every navigation waits for it:
src/navigation/navigationRef.ts
src/push/pushNotifications.ts — everything push does for the logged-in user: the tap, call-accepted and call-ended handlers, the permission requests, and init():
src/push/pushNotifications.ts
Not using the UI Kit? Delete the
@cometchat/chat-uikit-react-native import and the emitMessageEvent block in markConversationRead, point SCREENS and the route params at your own screens, and in logout.ts call CometChat.logout() instead of CometChatUIKit.logout().App.tsx — call usePushOnLogin() once, in a component that renders after CometChat is initialized, and pass navigationRef to your NavigationContainer:
App.tsx
usePushOnLogin() starts push after a fresh login and when a session is restored on launch, and removes the handlers when the user logs out — so a later login never registers them twice.
3.3 Align dependencies and configuration
- Peer dependencies:
@cometchat/chat-sdk-react-native(or the UI Kit) for chat,@cometchat/calls-sdk-react-nativefor calls, and React Navigation for the handlers above. init()options:fcmProviderId(Android) andapnsProviderId(iOS) — from step 1.notificationSmallIcon— the Android status-bar icon.showInForeground(defaultfalse) — show chat notifications while the app is open.ringInForeground(defaulttrue) — ring with the system call UI while the app is open. Setfalsewhen your app shows its own incoming-call screen, as the UI Kit does.voip(defaulttrue),androidChannelId,androidChannelName.
4. Configure the native Android layer
4.1 Gradle + Firebase
- Add
google-services.jsontoandroid/app. - Apply the Google Services plugin. The package already depends on
firebase-messaging, so don’t add it yourself:
android/build.gradle
android/app/build.gradle
minSdkVersion 24 or higher.
4.2 Manifest permissions and components
You don’t editAndroidManifest.xml. The package’s manifest is merged into your app with everything push and calls need:
- Components: its
FirebaseMessagingService, the incoming-call foreground service, the full-screenCallRingingActivity(shows over the lock screen), the call action receiver, and the background task service for killed-app declines. - Permissions:
POST_NOTIFICATIONS,USE_FULL_SCREEN_INTENT,FOREGROUND_SERVICE,FOREGROUND_SERVICE_PHONE_CALL,MANAGE_OWN_CALLS,WAKE_LOCK,VIBRATE,RECORD_AUDIO,CAMERAandBLUETOOTH_CONNECT. Camera and microphone hardware are declared optional, so Google Play doesn’t hide your app from devices without them.
xmlns:tools="http://schemas.android.com/tools" on the manifest element), and skip requestCallPermissions() and registerBackgroundCallTask():
android/app/src/main/AndroidManifest.xml
tools:node="remove" drops an entry whichever library declared it — keep any permission another part of your app still uses.
4.3 Notification icon
Add a white-on-transparent drawable namedic_notification — for example android/app/src/main/res/drawable/ic_notification.png. Android Studio generates one: right-click res → New → Image Asset, icon type Notification Icons, name ic_notification. Without it, the package falls back to your launcher icon, which the status bar draws as a plain white shape.
There is no Kotlin bridge to write: the ringing screen, the Answer and Decline actions, and the killed-app decline are built into the package.
4.4 OEM permissions for lock-screen calls
Stock Android shows the full-screen call over the lock screen out of the box. OEM skins (MIUI/Redmi/POCO, Oppo, Vivo) gate background-launched full-screen activities behind their own toggles — without them, a locked or killed call shows only a heads-up notification, and the ringing screen appears after unlock. Guide users to grant, on those devices:- Autostart — Settings → Apps → your app → Autostart (or the Security app).
- Display pop-up windows while running in background — Settings → Apps → your app → Other permissions.
- Show on lock screen — the same “Other permissions” screen.
- Disable battery optimization for the app.
4.5 Apps that also use @react-native-firebase/messaging
Android delivers FCM messages and token refreshes to only one FirebaseMessagingService, and React Native Firebase ships its own — so with both installed, one of them silently receives nothing. Replace both with a service of your own that forwards to each:
- Remove both library services and register yours:
android/app/src/main/AndroidManifest.xml
- Add Firebase Messaging to your app so the service can extend it (use the BOM version your other Firebase libraries use):
android/app/build.gradle
- Add the service next to
MainApplication.kt:
AppMessagingService.kt
- React Native Firebase also hands every push to its JavaScript handlers. Skip CometChat’s there, in
onMessageandsetBackgroundMessageHandler:
5. Token registration and runtime events
5.1 FCM tokens
The package fetches the FCM token duringinit() and registers it with your FCM provider for the logged-in user; when Firebase refreshes the token, it registers the new one. If init() runs a moment before login finishes, registration retries 5 times, 3 seconds apart.
setupPushOnLogin() requests the permissions, in order, before init(). To check or request them elsewhere:
requestNotificationPermission() resolves true or false on the user’s answer. It rejects when the permission could not be requested at all — a different situation from the user declining, and not a reason to skip init():
You rarely need it, but you can register a token yourself:
5.2 Local notifications and navigation
- App in the background or killed: the package’s service shows the notification with your
ic_notificationicon. - App open: the payload goes to
onMessageReceived; a system notification also shows whenshowInForegroundistrue. - Tap:
onNotificationTapfires, andopenFromNotificationmarks the conversation read, then opens the thread for a thread reply, otherwise the conversation. A tap that launched the app is held until your handler subscribes, and navigation waits for the navigator.
5.3 Call events
5.4 Unregister on logout
Addsrc/push/logout.ts and call it from your logout button instead of logging out directly:
src/push/logout.ts
6. Badge count
CometChat’s Enhanced Push Notification payload includes anunreadMessageCount field (a string) representing the total unread messages across all conversations for the logged-in user. You can use it to set a launcher badge.
6.1 Enable unread badge count on the CometChat Dashboard
- Go to CometChat Dashboard → Notifications → Settings → Preferences → Push Notification Preferences.
- Scroll to the bottom and enable the Unread Badge Count toggle.
unreadMessageCount field in every push payload sent to your app.
6.2 Expected payload format
CometChat sends FCM data messages with this structure (relevant fields):unreadMessageCount is a string; the package hands every payload value to JavaScript as a string, so convert it with Number() before use.
6.3 Update the app badge from the push payload
Android has no OS-level app icon badge API, and the push package doesn’t manage launcher badges. While the app is open,onMessageReceived receives each payload — hand unreadMessageCount to a launcher-badge library. In the background the package shows the notification, and Android’s notification dot marks the app icon.
7. Testing checklist
Use physical devices and a release build: a debug build loads its JavaScript from Metro, which delays the first JavaScript that runs in a killed app.- Fresh install: install, log in, and confirm the notification prompt waits for your answer before the microphone/camera prompt appears. Then send a message from another user — it must arrive.
- Chat notifications:
- App open: exactly one notification (
showInForeground: true). - App in the background: a notification appears; tapping it opens the conversation.
- App killed: tapping the notification starts the app in the conversation.
- A thread reply opens the thread; a group message opens the group.
- App open: exactly one notification (
- Calls, app killed, phone locked:
- The full-screen ringing screen shows with Accept and Decline.
- Accept connects the call with audio both ways.
- Decline shows the call as rejected on the caller’s side.
- The caller cancelling stops the ring.
- Calls, app in the background: the ringing screen shows, and accept and decline both work.
- Calls, app open: only your in-app incoming-call screen rings (
ringInForeground: false). - Logout: log out, send a message from another user — nothing arrives. Log in as another user — only that user’s notifications arrive.
- OEM devices (MIUI, Oppo, Vivo): grant the step 4.4 permissions and re-check locked and killed calls.